

Build a local cross-chain testing playground on Polkadot with Zombienet


Table of contents
- Overview
- Step 1: Create your parachain binary
- Step 2: Install Zombienet for your project
- Step 3: Get the relay chain binary and add all binaries to the zombienet/bin dir
- Step 4: Add the network configuration file
- Step 5: Launch your network
- Step 6: Write tests
- Step 7: Write a script and interact with the network

Zombienet, a tool developed by Parity Technologies provides a rich set of capabilities for running integration tests on blockchains connected to Polkadot. It provides more flexible and extensible capabilities than its predecessor, Polkadot Launch and is a particularly useful tool to integrate into the CI jobs of parachain development teams.
In this tutorial, we'll be using the basic functionality of Zombienet to easily launch your own local parachain network. This tutorial is based on the live stream we did with Javier (Simulation Network Lead at Parity) which you can watch in full here.
📺 Sign-up to Substrate Seminar to participate in future sessions.
Overview
We'll spawn a custom-configured relay-parachain network and run tests on it using the integrated test runner and a simple JS script to query our parachain.
By the end of this tutorial you will have a high level understanding of Polkadot’s network architecture and how you can run simple integration tests on a local parachain dev environment.
Setting up a parachain network means we'll need a binary for a Relay Chain node - which we'll get from compiling a Polkadot node locally - and a binary of a parachain node, which we'll get from the parachain node template. Note that you'll need to ensure that the binaries you create use the same Polkadot tags (which in this guide is polkadot-v0.9.36). Let's get to it.
💡 Although not strictly a prerequisite, I recommend going through the Connect to a Relay Chain tutorial in the Substrate documentation if you're new to launching a parachain network.
Step 1: Create your parachain binary
Start by cloning the parachain node template, which we'll use as the main project template for this tutorial.
git clone https://github.com/substrate-developer-hub/substrate-parachain-template
Switch to the tag that corresponds to the latest stable release tag you plan to use in your network (in this tutorial it's polkadot-v0.9.36 ):
cd substrate-parachain-template
git checkout polkadot-v0.9.36
Compile your node:
cargo build --release
Step 2: Install Zombienet for your project
We'll first want to create a folder to put assets relevant to Zombienet, which will include configuration files and the binaries for our network's relay chain and parachain nodes.
Inside the parachain node template project, create a new folder called zombienet: and a sub-directory called bin :
mkdir zombienet/bin
Download the binary from Zombienet release page and copy it to /zombienet/bin (note: the latest release at the time of writing is v1.3.30 ). For Linux users:
wget https://github.com/paritytech/zombienet/releases/download/v1.3.30/zombienet-linux -P ./zombienet/bin
chmod +x ./zombienet/bin/zombienet-linux
Or for MacOS users:
wget https://github.com/paritytech/zombienet/releases/download/v1.3.30/zombienet-macos -P ./zombienet/bin
chmod +x ./zombienet/bin/zombienet-macos
Check that zombienet is installed properly by running ./zombienet/bin/zombienet-macos --help. You should see the list of available commands and sub-commands:
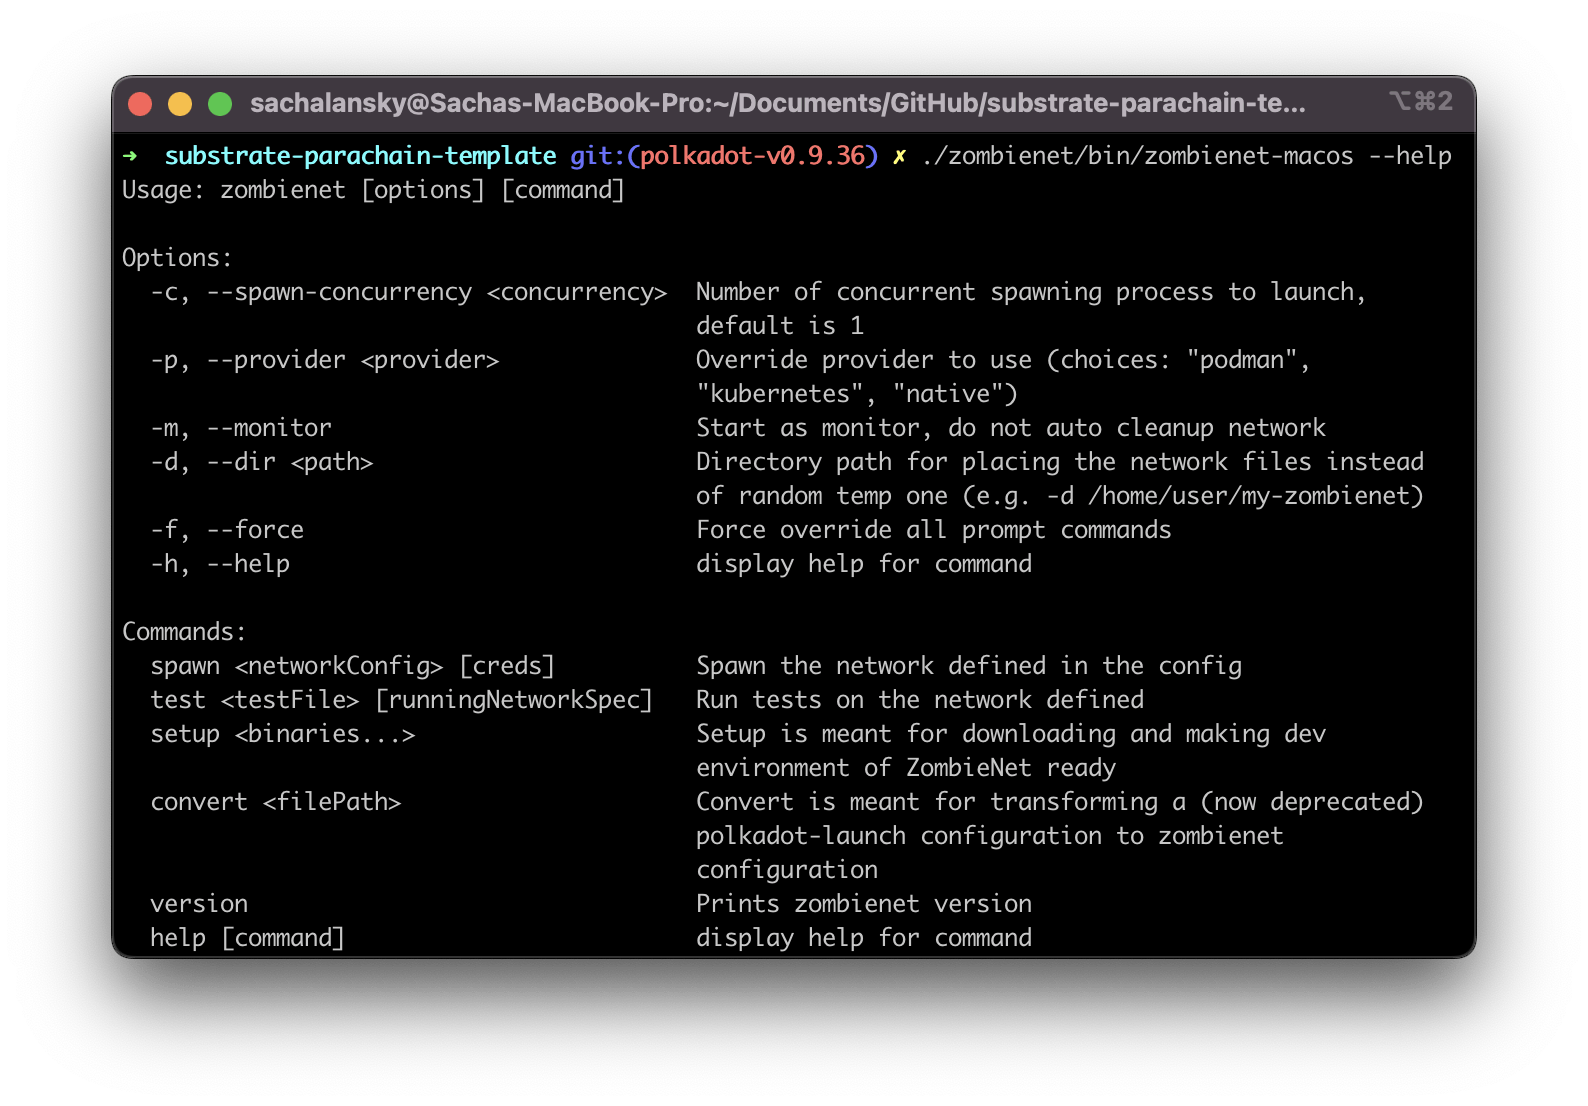
Have a look at the demo of these different commands from the Zombienet seminar if you're curious about what they do.
Step 3: Get the relay chain binary and add all binaries to the zombienet/bin dir
In step 1, we compiled the parachain node. In this step, we'll need to put this binary in the dedicated folder we created in step 2 to make it easily accessible for Zombienet.
Copy the binary over:
cp ./target/release/parachain-template-node ./zombienet/bin
Now, we'll need to compile the relay chain node and add it to this folder too (note the tags we're using). Download the binary from Polkadot Releases (only for Linux users) and copy it to /zombienet/bin:
wget https://github.com/paritytech/polkadot/releases/download/v0.9.36/polkadot -P ./zombienet/bin
chmod +x ./bin/polkadot
Or generate it yourself from the code (other OS users):
git clone https://github.com/paritytech/polkadot
cd polkadot
git checkout polkadot-v0.9.36
cargo build --release
cp ./target/release/polkadot ../zombienet/bin
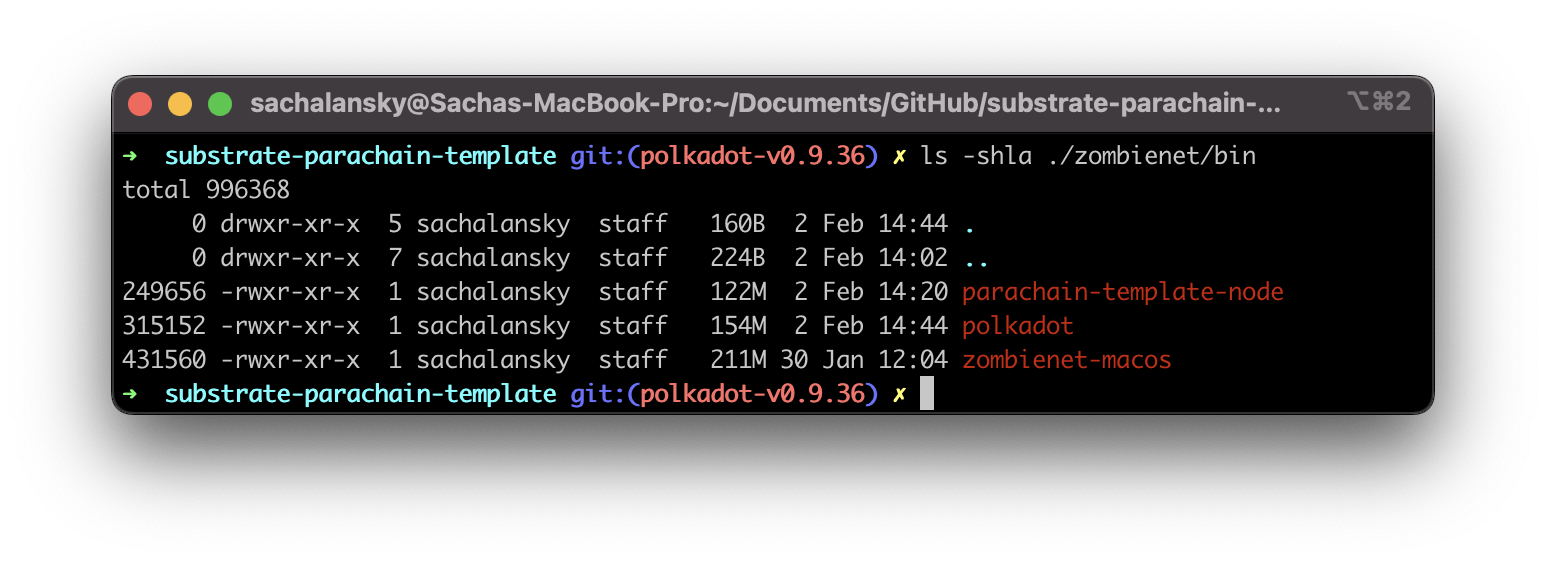
Check that your bin folder has all the binaries we created. It should look similar to this:
Step 4: Add the network configuration file
In the zombienet folder, create a config.toml and paste the following configuration:
[settings]
timeout = 1000

[relaychain]
chain = "rococo-local"
default_command = "./zombienet/bin/polkadot"
default_args = [ "-lparachain=debug" ]

[[relaychain.nodes]]
name = "alice"
validator = true
ws_port = 9944

[[relaychain.nodes]]
name = "bob"
validator = true

[[relaychain.nodes]]
name = "charlie"
validator = true

[[parachains]]
id = 1337
addToGenesis = true
cumulus_based = true

[parachains.collator]
name = "collator01"
command = "./zombienet/bin/parachain-template-node"
ws_port = 9955
rpc_port = 9956

[types.Header]
number = "u64"
parent_hash = "Hash"
post_state = "Hash"
The configuration file is specifying:
The relay chain node to use
The collator node of our parachain
Alice and Bob accounts as network validators (with test net tokens)
Note: in order to make this network enable XCM you can update your configuration file to open HRMP channels between the parachain and relay chain nodes. To do that, you can the following to the config.toml file:
##--snip -- ##
[[hrmp_channel]]
sender = 1000
recipient = 1001
maxCapacity = 8
maxMessageSize = 8000

[[hrmp_channel]]
sender = 1001
recipient = 1000
maxCapacity = 8
maxMessageSize = 8000
Step 5: Launch your network
With the native binaries compiled and network configuration file specified, we can check if our network launches as expected.
For Linux users, run:
./zombienet/bin/zombienet-linux -p native spawn ./zombienet/config.toml
For MacOS users:
./zombienet/bin/zombienet-macos -p native spawn ./zombienet/config.toml
Once it boots up, you can open up the PolkadotJS developper UI in a browser where you can interact with your chain. Use the links for the Relay Chain endpoint and Parachain Chain endpoint provided by the Zombienet CLI.
Step 6: Write tests
Zombienet provides a built-in test runner to allow users to write scripts and integration tests with a natural language DSL (file extension.zndsl). It comes with a VS code extension you can install to help format and write tests. But we won't need it for this guide.
💡 Check out the Zombienet docs to see a full list of the available assertions here or skip to this part of the seminar to learn more about the types of tests you can write.
Create the test file
Create a file called network-tests.zndsl and paste in the code below which passes in the network configuration you created in the previous step:
Description: Network tests
Network: ./config.toml
Creds: config
Add assertions
The first thing we want to check is whether the nodes we specified in our network configuration are actually up. Write this assertion next in your test file:
# well known functions
alice: is up
bob: is up
We can assert that a log outputs as expected. To do this, add this:
# logs
bob: log line matches glob "*rted #1*" within 10 seconds
bob: log line matches "Imported #[0-9]+" within 10 seconds
And now run the network with the test command:
./zombienet/bin/zombienet-macos -p native test ./zombienet/network-tests.zndsl
Step 7: Write a script and interact with the network
Create a file called testing-script.js and paste in the snippet below to do a simple balance check:
// Our address for Alice on the dev chain
const ALICE = '5GrwvaEF5zXb26Fz9rcQpDWS57CtERHpNehXCPcNoHGKutQY';
const BOB = '5FHneW46xGXgs5mUiveU4sbTyGBzmstUspZC92UhjJM694ty';

async function run(nodeName, networkInfo, args) {
    const {wsUri, userDefinedTypes} = networkInfo.nodesByName[nodeName];
    const api = await zombie.connect(wsUri, userDefinedTypes);

    const acc = args[0] === "alice" ? ALICE : BOB;
    const balance = await api.query.system.account(acc);

    console.log(`Current balances for ${args[0]} is ${balance.data.free}`);
    return balance.data.free;
}

module.exports = { run }
Now add the script to your test runner:
# script
alice: js-script ./testing-script.js within 200 seconds
Run the test runner:
./zombienet/bin/zombienet-macos -p native test ./zombienet/network-tests.zndsl
Next steps
Congratulations! If you've been successful up until here you're ready to start experimenting with a simulated Polkadot network.
Write XCM transactions to create multi-chain interactions in your network.
Write multiple scripts that simulate your parachain's interaction with the relay chain (have a look at the Polkadot JS API examples to learn how to interact with the network in Javascript).
Add other parachain nodes to the network, so that you can interact with several parachain runtimes connected to your local network using Zombienet.